Despite how it may look from the outside, web development is a challenging process To minimize issues in your live site, it is indeed a good idea to test everything beforehand. Setting up a WordPress test site is the correct and imperative way to do that.
A staging site lets you transfer all the mundane and potential tasks to the copy of your site. It is especially relevant for developers and agencies as it keeps the live website online & error-free.
Let’s explore this exciting topic of WordPress testing and how to make WordPress test sites.
What is a WordPress Staging Site?
A WordPress staging site is a clone of your live site that is set in a private environment without interrupting the live site. It’s much like pre-event preparations; it gives you a way to set up your event (in this case, website) however you want in a private, low-stress environment.
From the staging site, you can take those elements & transfer them to the live site, often with just a few clicks. On the live website, the transfer process is generally straightforward when you have the right tools.
You may already use a local development environment, and there are a few similarities. However, a staging site is often more flexible regarding what you can “pull and push”. It can also let you work with interactive site elements that need a live server.
Why use a WordPress test site?
Developers even use a local development environment to test WordPress locally, we’d suggest using a staging site instead. Because there are lots of positive reasons to do so. As we explained, it lets you able to work on any site elements without impacting your live site.
One of the significant issues and essential with staging is gauging the stability of changes without touching the dynamic content. A good local development environment can often simulate a server setup.
However, it is not a substitute for a live server. A staging site can show how your site will react to any changes and gives you the chance to modify things before it impacts your site.
Besides, when a developer works in the website development process there are some critical points of their process and every process requires a staging site.
- The heavy planning stage
- The software stockpile is essential, it cascades down to the site’s scalability & performance
- And then there’s the revision & bug fixing stage process.

The first aspect is to get your live site a staging site to perform some ‘stress tests.’ Aside from these, there are some good reasons why using a WordPress test site is a must:
- You can test new functionality away from the public because it is a private blank canvas. Whether it’s to update WordPress core, or test WordPress plugins and themes, meanwhile handling other issues that arise.
- It increases the performance of your site by handling beforehand all the core issues or side by side doing all the checking in the staging site.
- It is a way to protect a website’s SEO by removing threats of an error on your website.
When should you use a staging site?
Given what we’ve discussed so far, a staging site is a recommended step in the web development/support process. Pulling your live site to staging is something that should become a habit so that you never make the mistake of modifying your live site.
Still, there are various instances where it’s highly suggested to use a sandbox site.
- Installation of any new plugins or themes must be tested on a WordPress sandbox site so that the new changes don’t affect the live site
- For simple updates, of themes, plugins, or WordPress core.
- If you have significant code-based changes, they should always be tested first on the test site.
How to make WordPress sandbox sites using InstaWP?
There are different ways to set up a WordPress test site. One of the best ways is to use a staging site tool. A tool that is dedicated to providing you with the best, quick, and most efficient free WordPress test site.
Here’s what we have got the best way to do it, as you would have already seen from the title. InstaWP is synonymous with instant WordPress test sites, it is a service designed and developed to spin up new WordPress staging sites and create sandbox environments within seconds.
It is developed to work perfectly for everyone, it caters to a variety of use cases based on requirements & context. It is trusted by 6k+ users across 50+ countries and is growing by leaps and bounds every single day.
InstaWP is a tool that lets you create and launch websites within a few clicks, letting you choose the WP version, PHP version, and your preferred configuration. Let’s break down the process of making a WordPress test site in InstaWP.
1. Create an account on InstaWP
To get access to the InstaWP dashboard and use the features of the tool, it is a must to create an account irrespective of whether you are creating it for free or for paid purposes. To create the account go to – https://app.instawp.io/onboard or directly search for InstaWP and visit the website.
If you visit the main website, click on the “Try for Free” button and it will directly take you to the “set up new site” page. If you launch your site instantly without creating the account you can only get access to the WordPress website & dashboard, but not to the InstaWP dashboard. Therefore, create your account by navigating to the “Sign up” option or “Create a free account.”
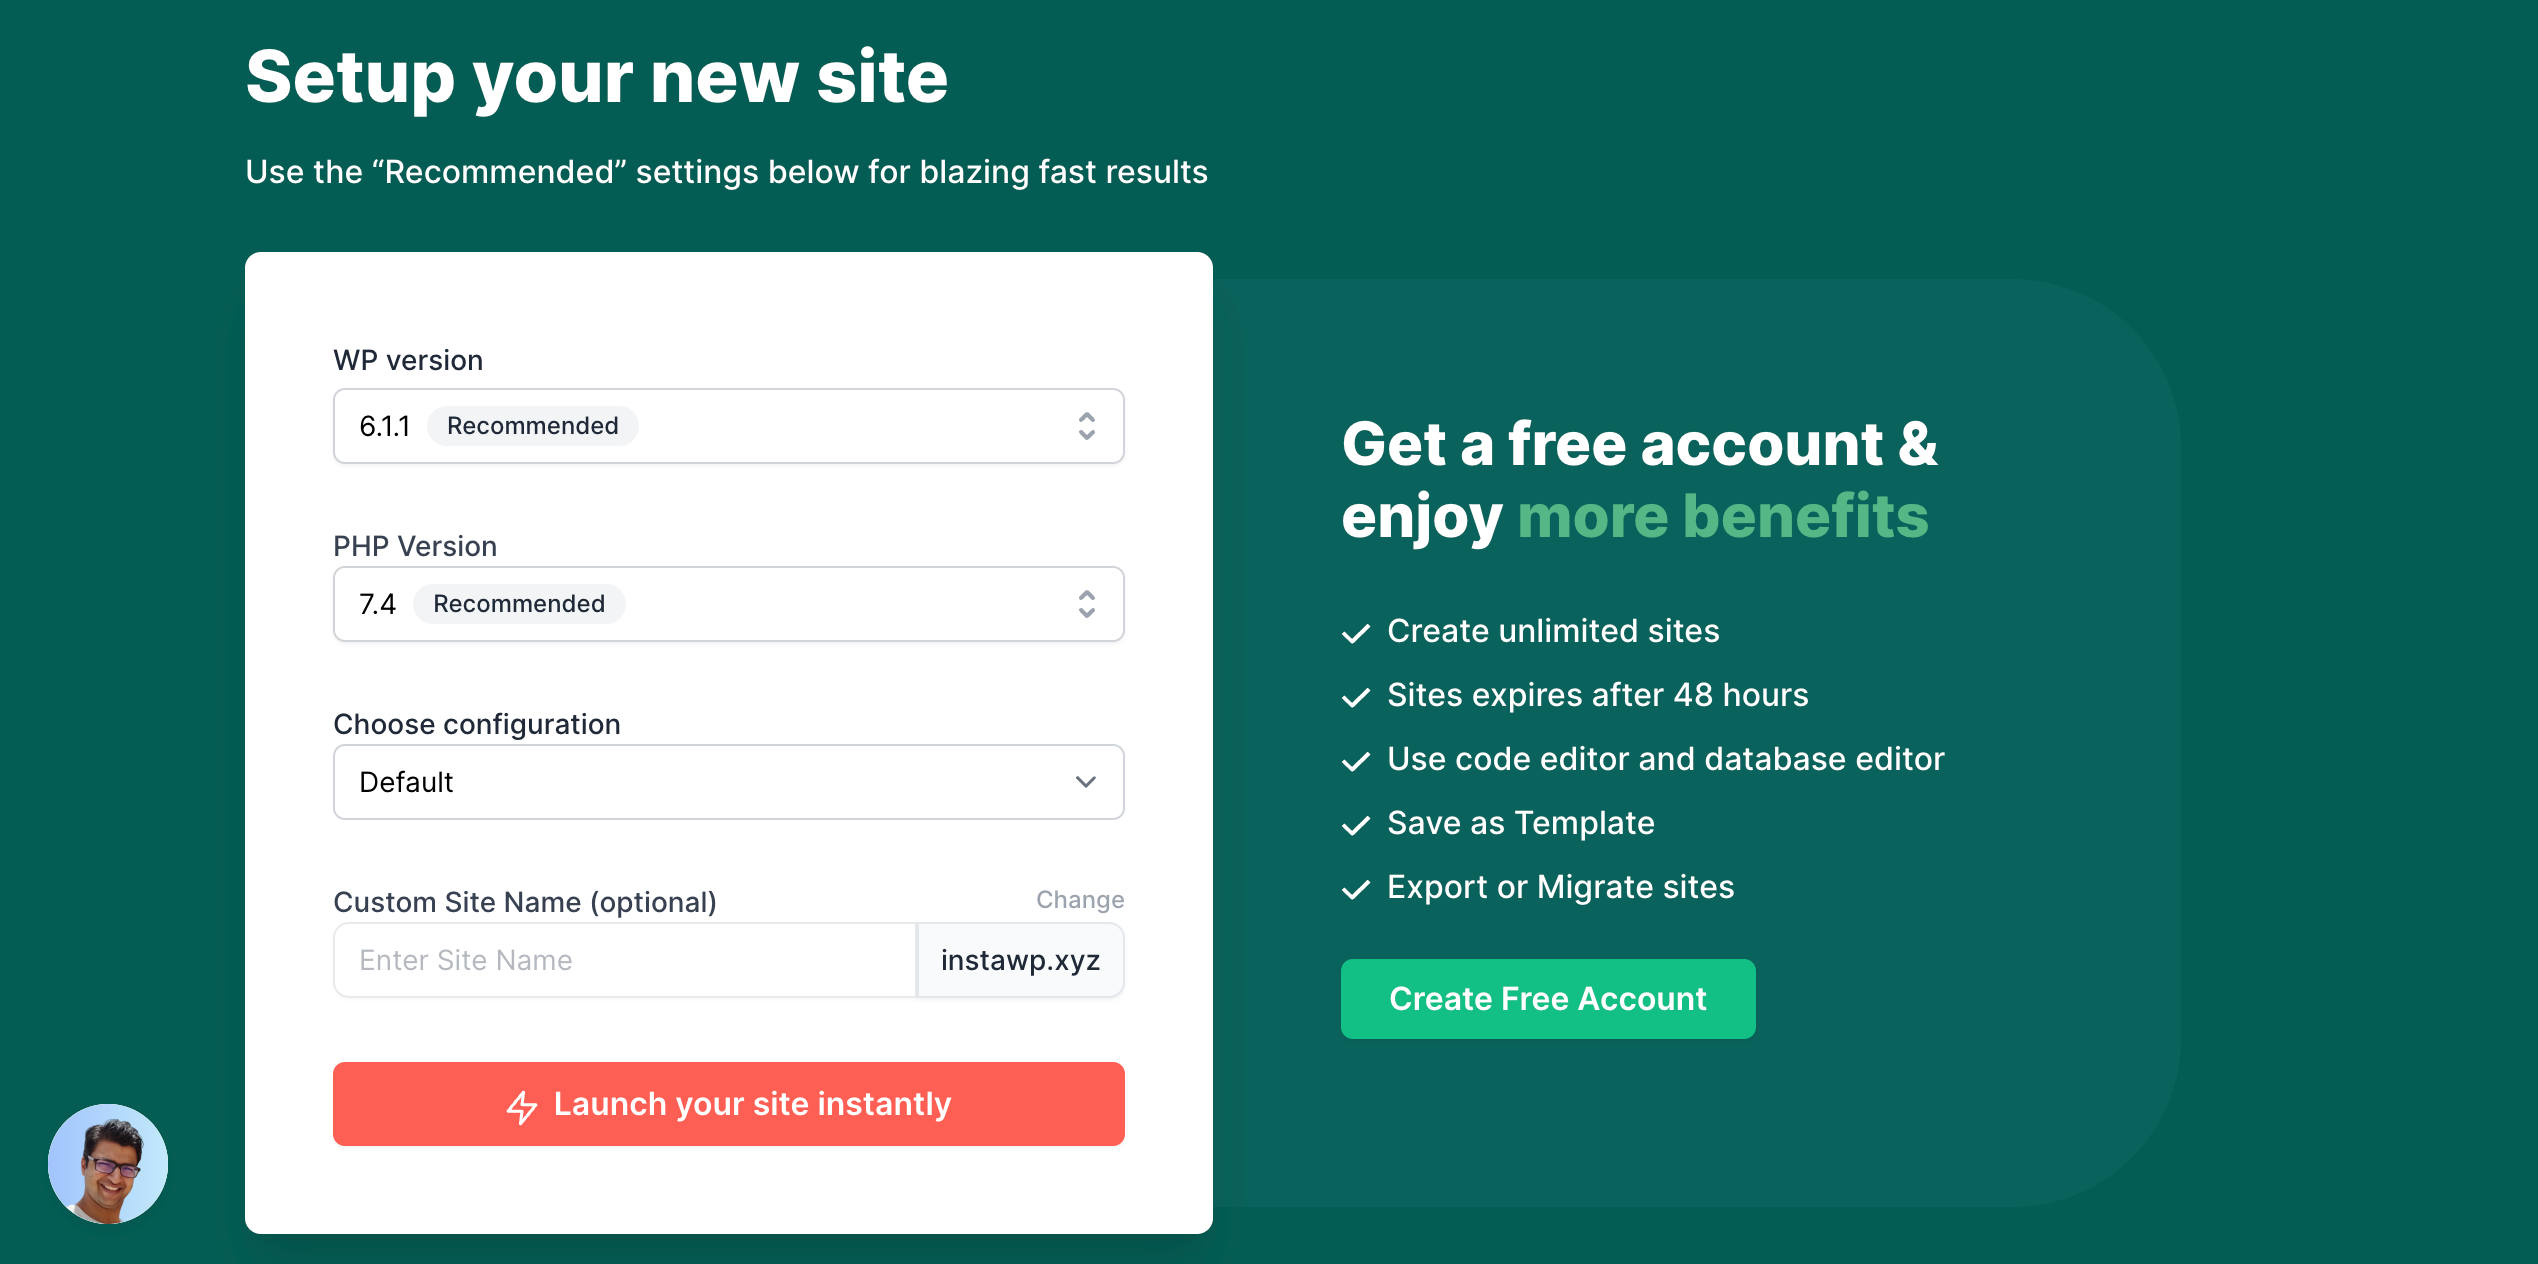
InstaWP has both free and paid versions, with the former giving you the benefit of creating unlimited sites that are stored for up to 48 hours. Aside from that, you can use a code editor & database editor, save the site as a template, and export or migrate sites.
2. Create/Launch a WordPress test site
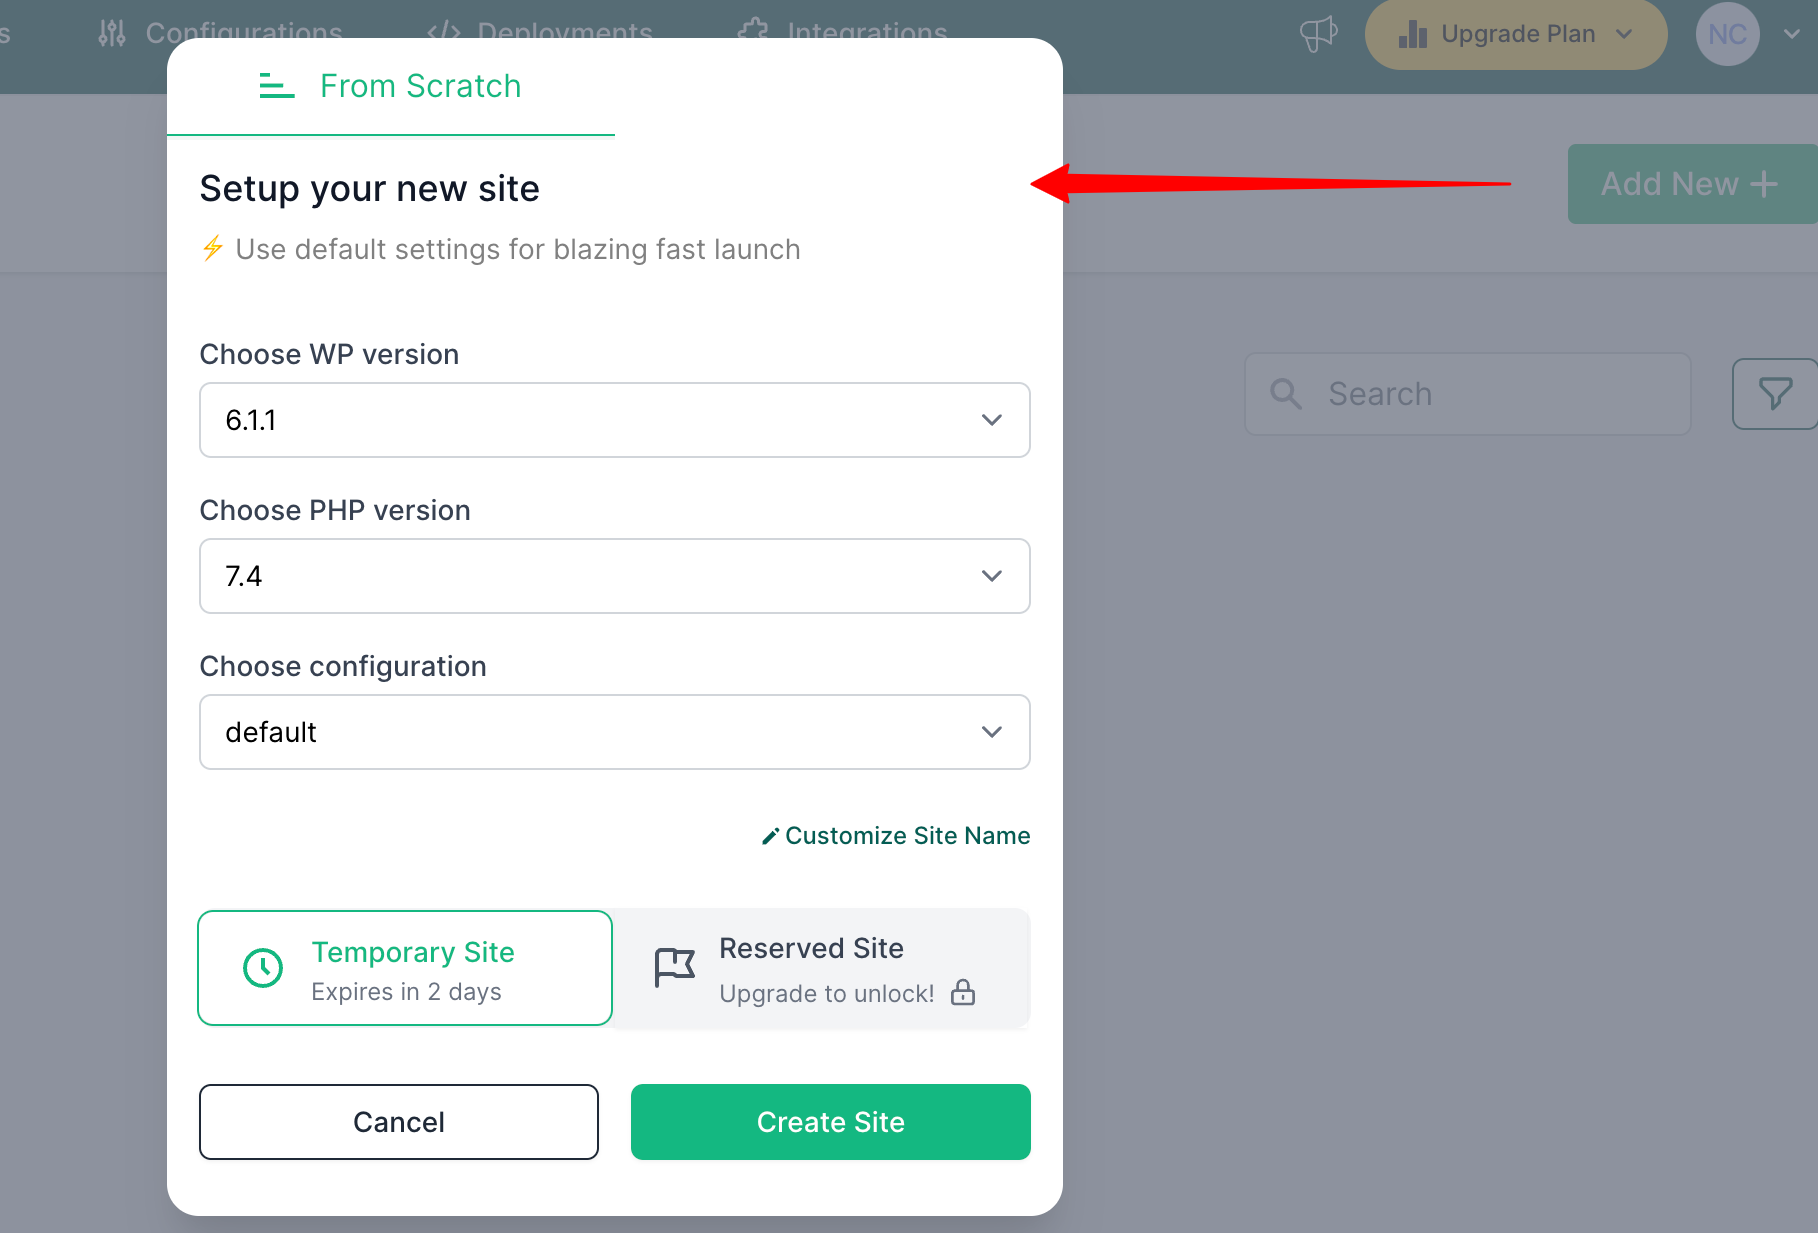
Once the account is created on InstaWP, the next step is to launch your staging site. All you need to do is click on the “Add New +” button in the dashboard from the top right. Choose a WP version, PHP version, or other configuration, and even customize your site name.
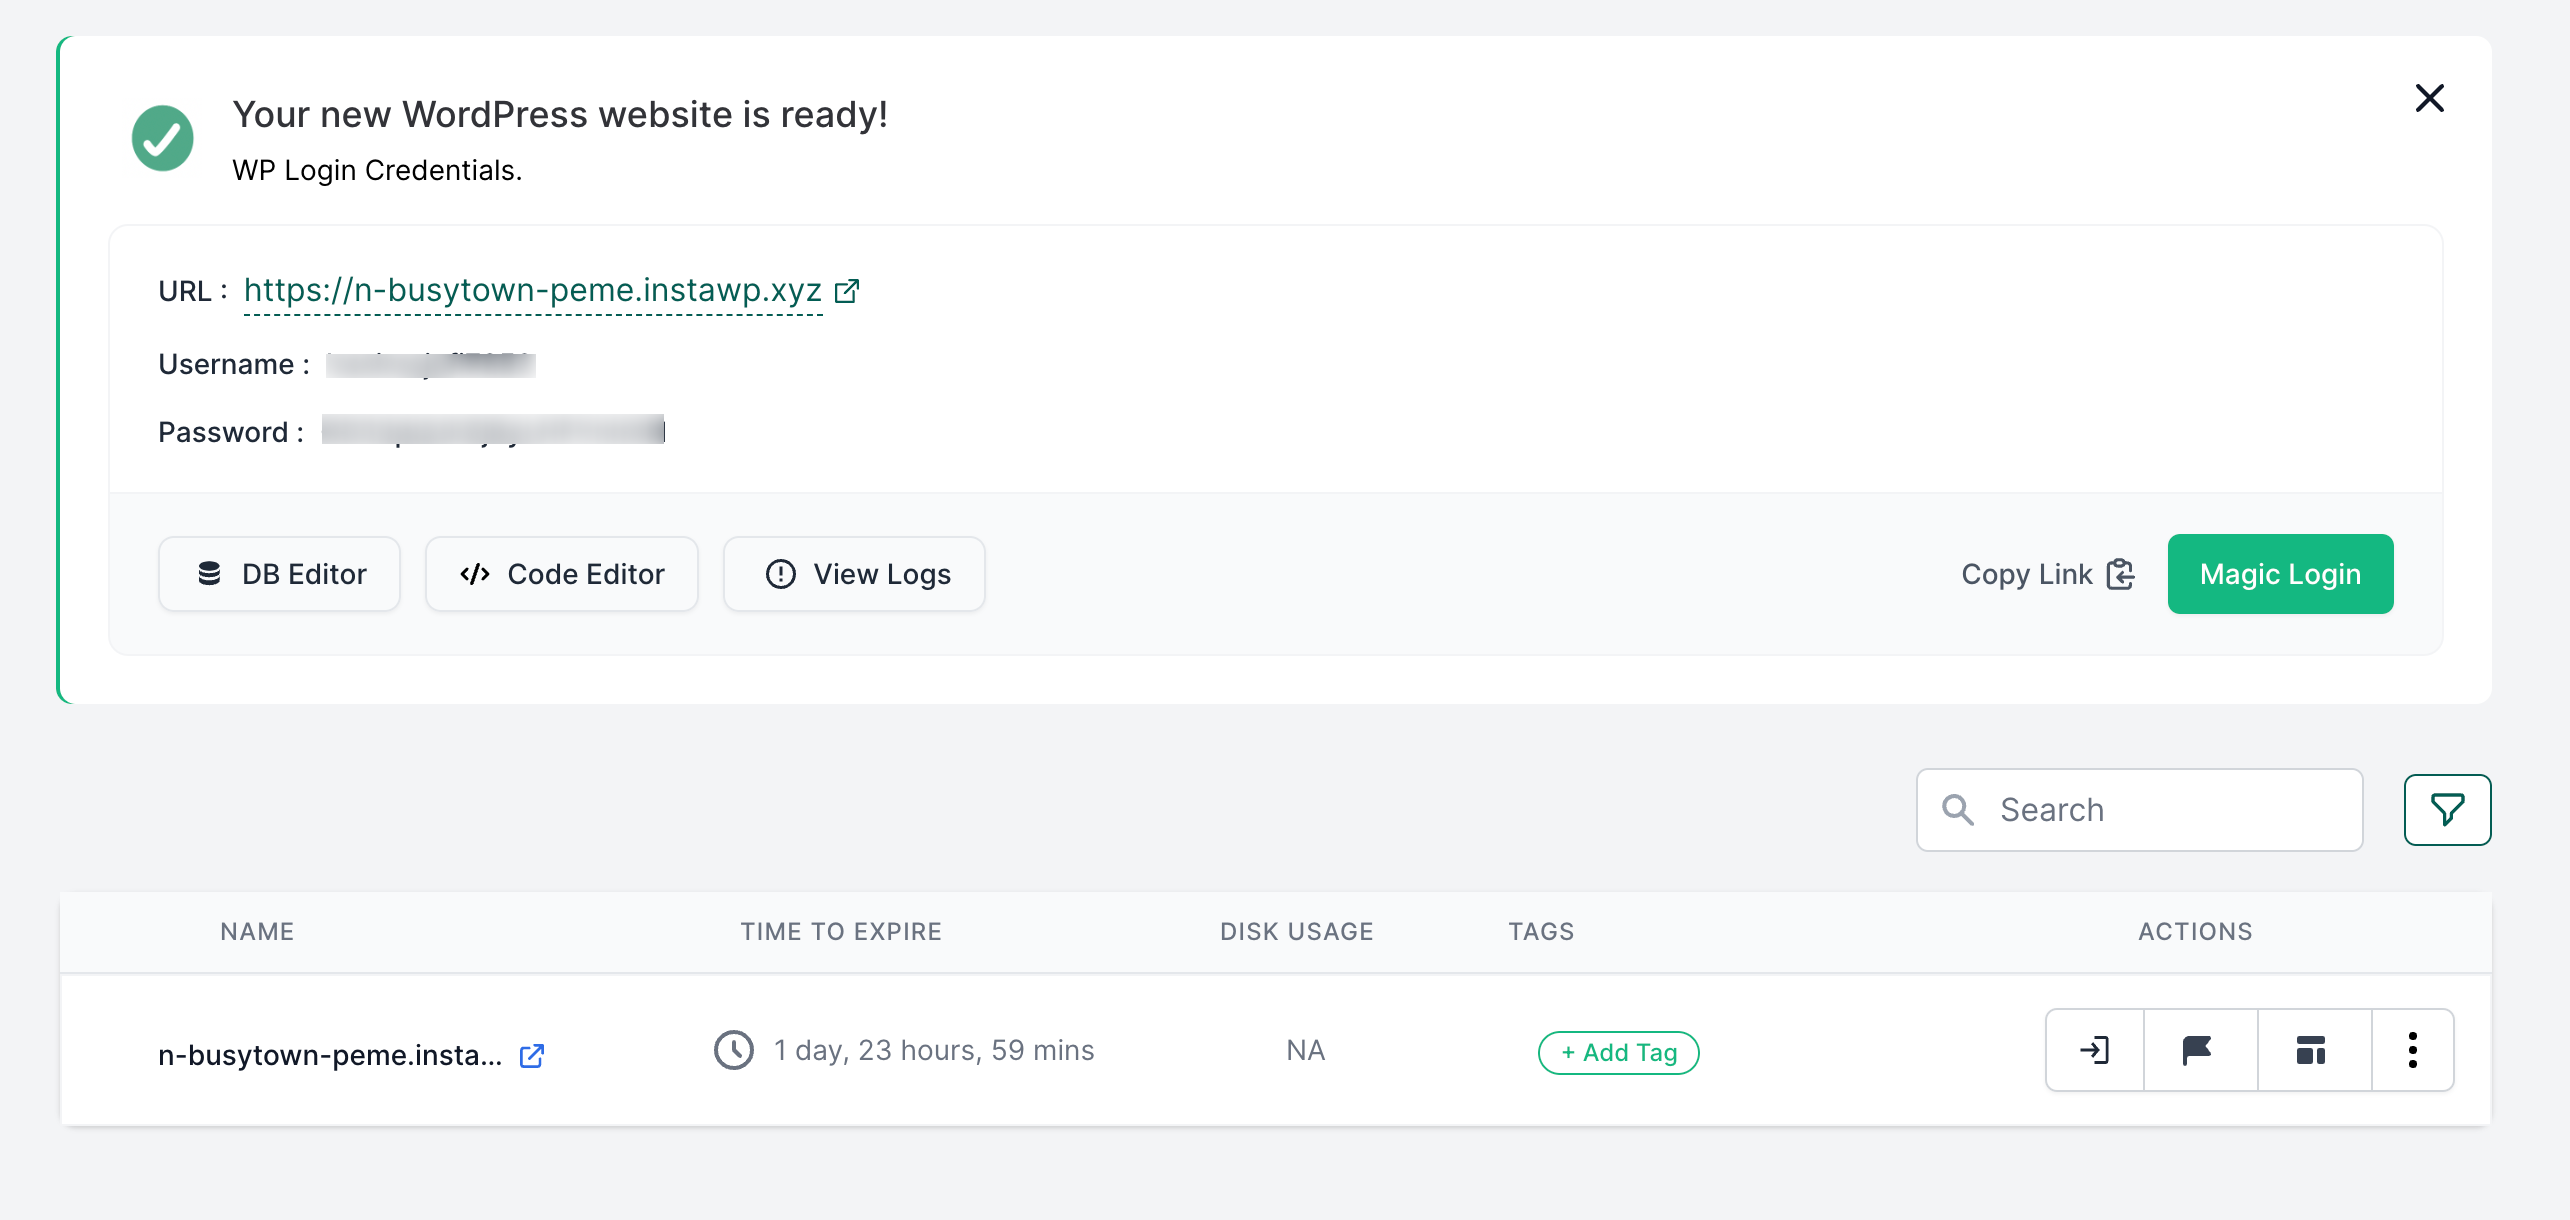
Once you’ve entered the specifications, your site will appear on the dashboard within seconds. It will show all the login credentials and auto-login [Magic Login] option that will lead you to the WordPress dashboard.
Note* It will be recommended to use default settings while setting up your new site i.e, WP & PHP versions for blazing fast launch.
3. Customize the site
Now to customize your site for updating or testing WordPress plugins and themes or checking for any other issues, InstaWP gives you free access to both database and the code editor and lets you auto-login to the WP dashboard.
To auto-login either hit the “Magic Login” button you’ll see with the WP login credentials or you can click on the “Auto Login” option, which is the first option under “Actions” of your new site.
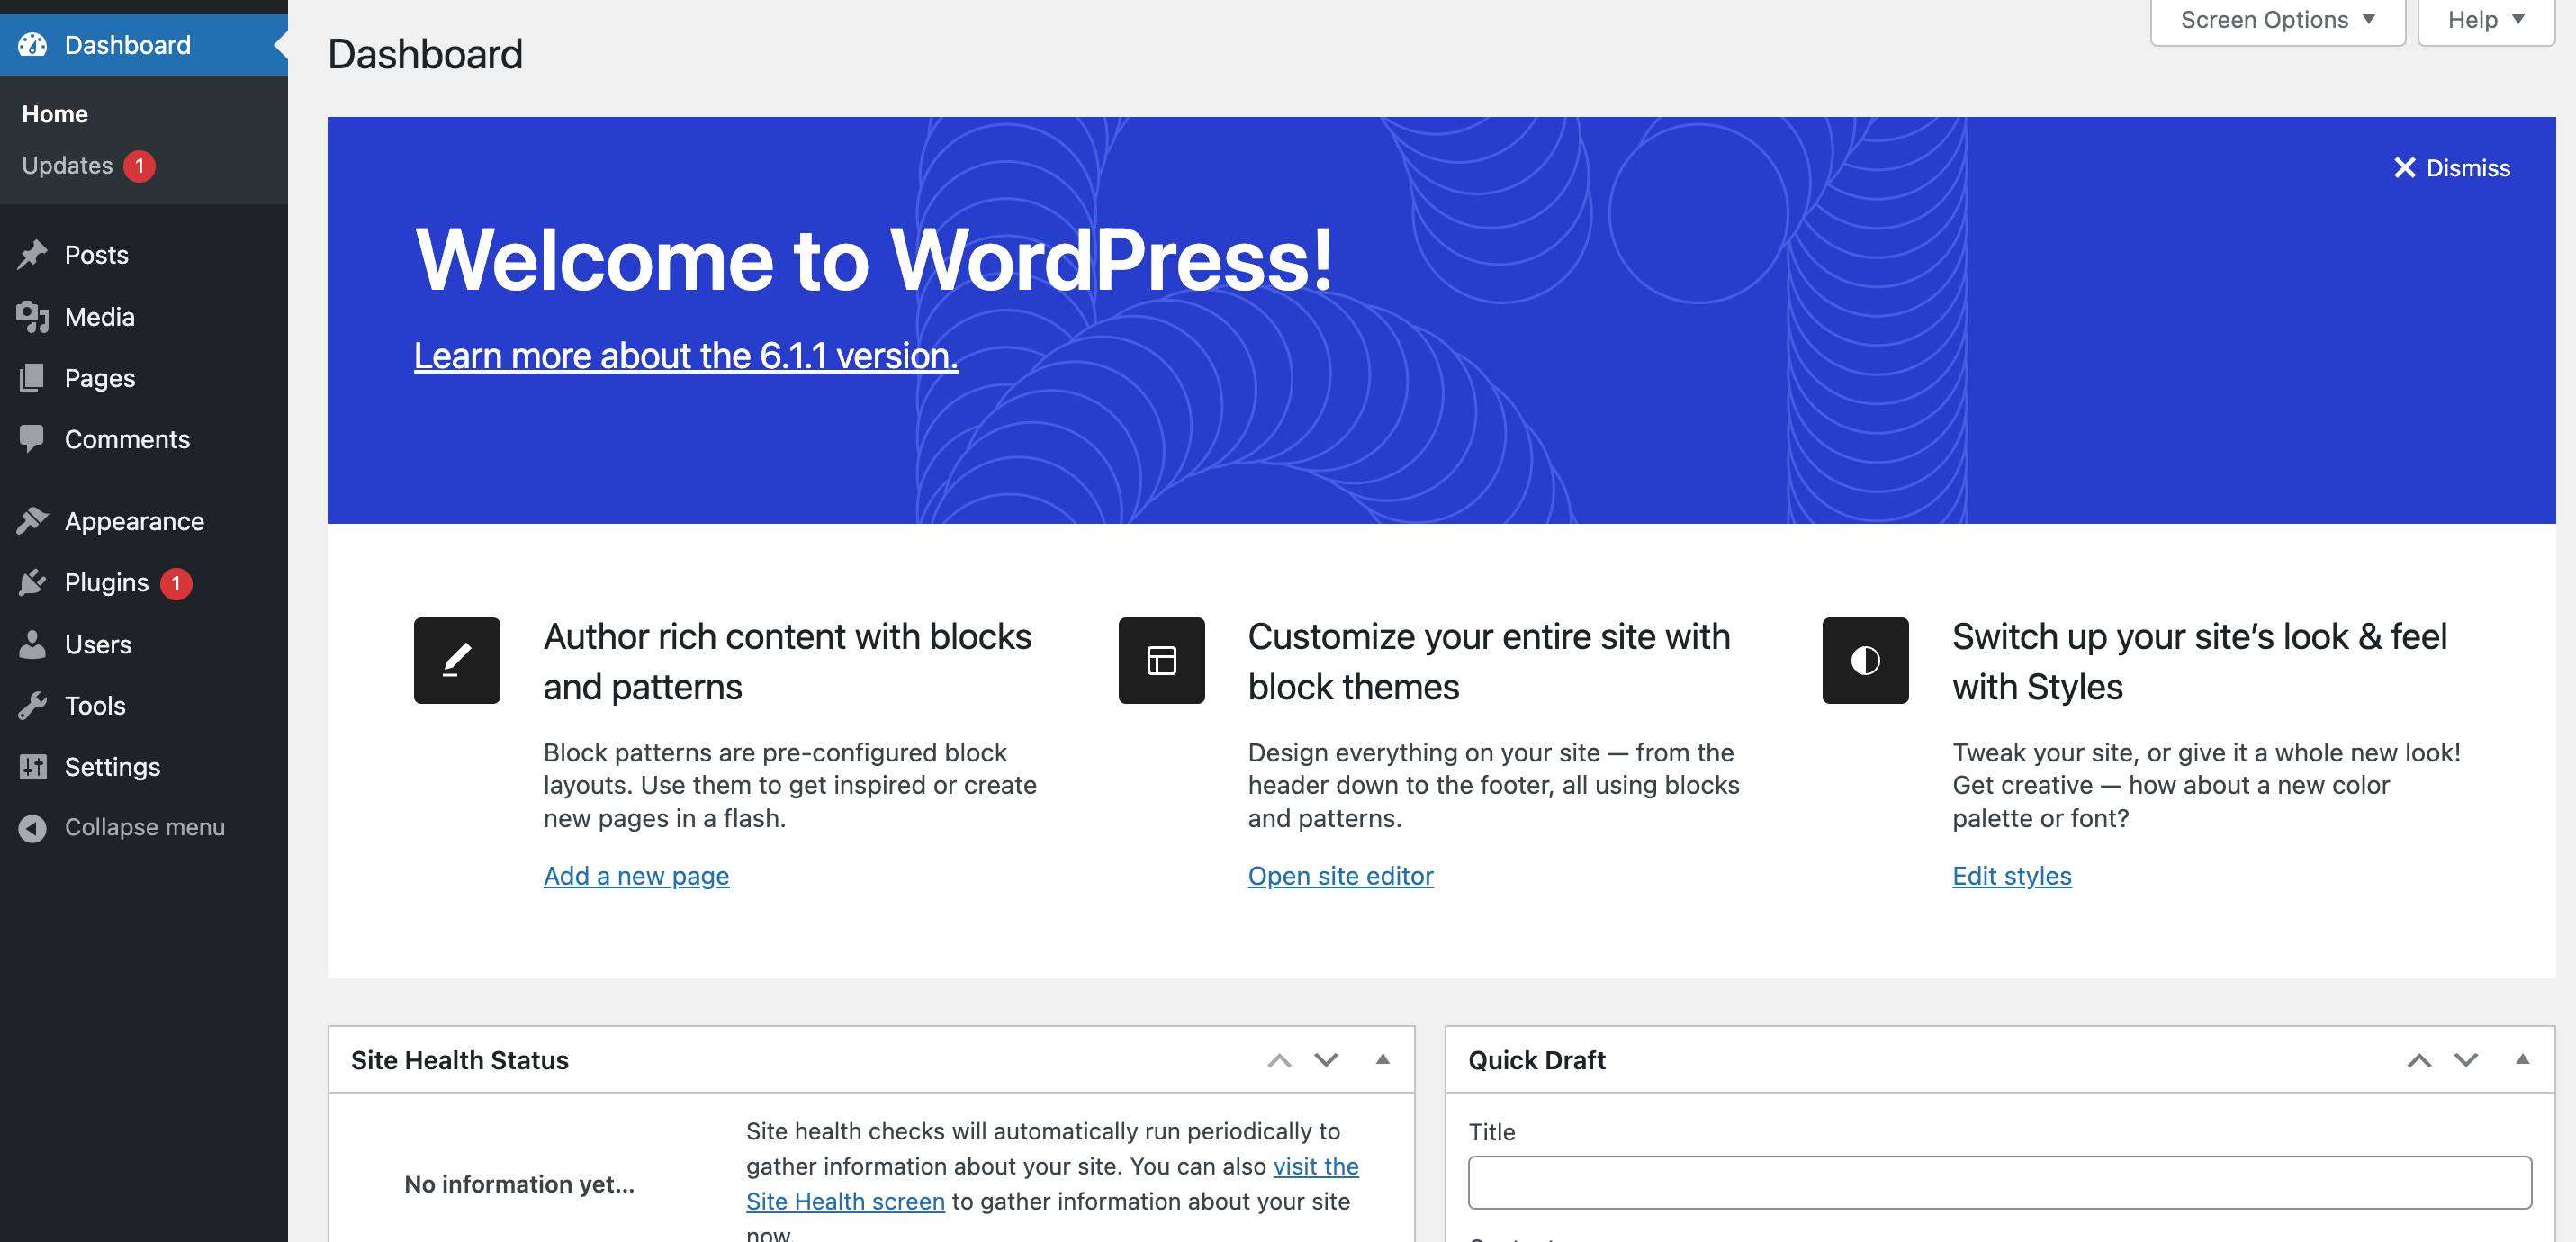
Here, you can change plugins, themes, content, CSS, and even the entire structure of your site. It’s a great way to show your clients beforehand the site you’ve created or the changes you’ve made.
With InstaWP moving the changes live is also incredibly simple. You can save the site templates or clone them, making it easier to work on new projects with certain plugins or themes you prefer.
4. Configure InstaWP features
Apart from all the features we discussed in the above process, there are many other InstaWP tools or features that you can manage while working on your testing site.
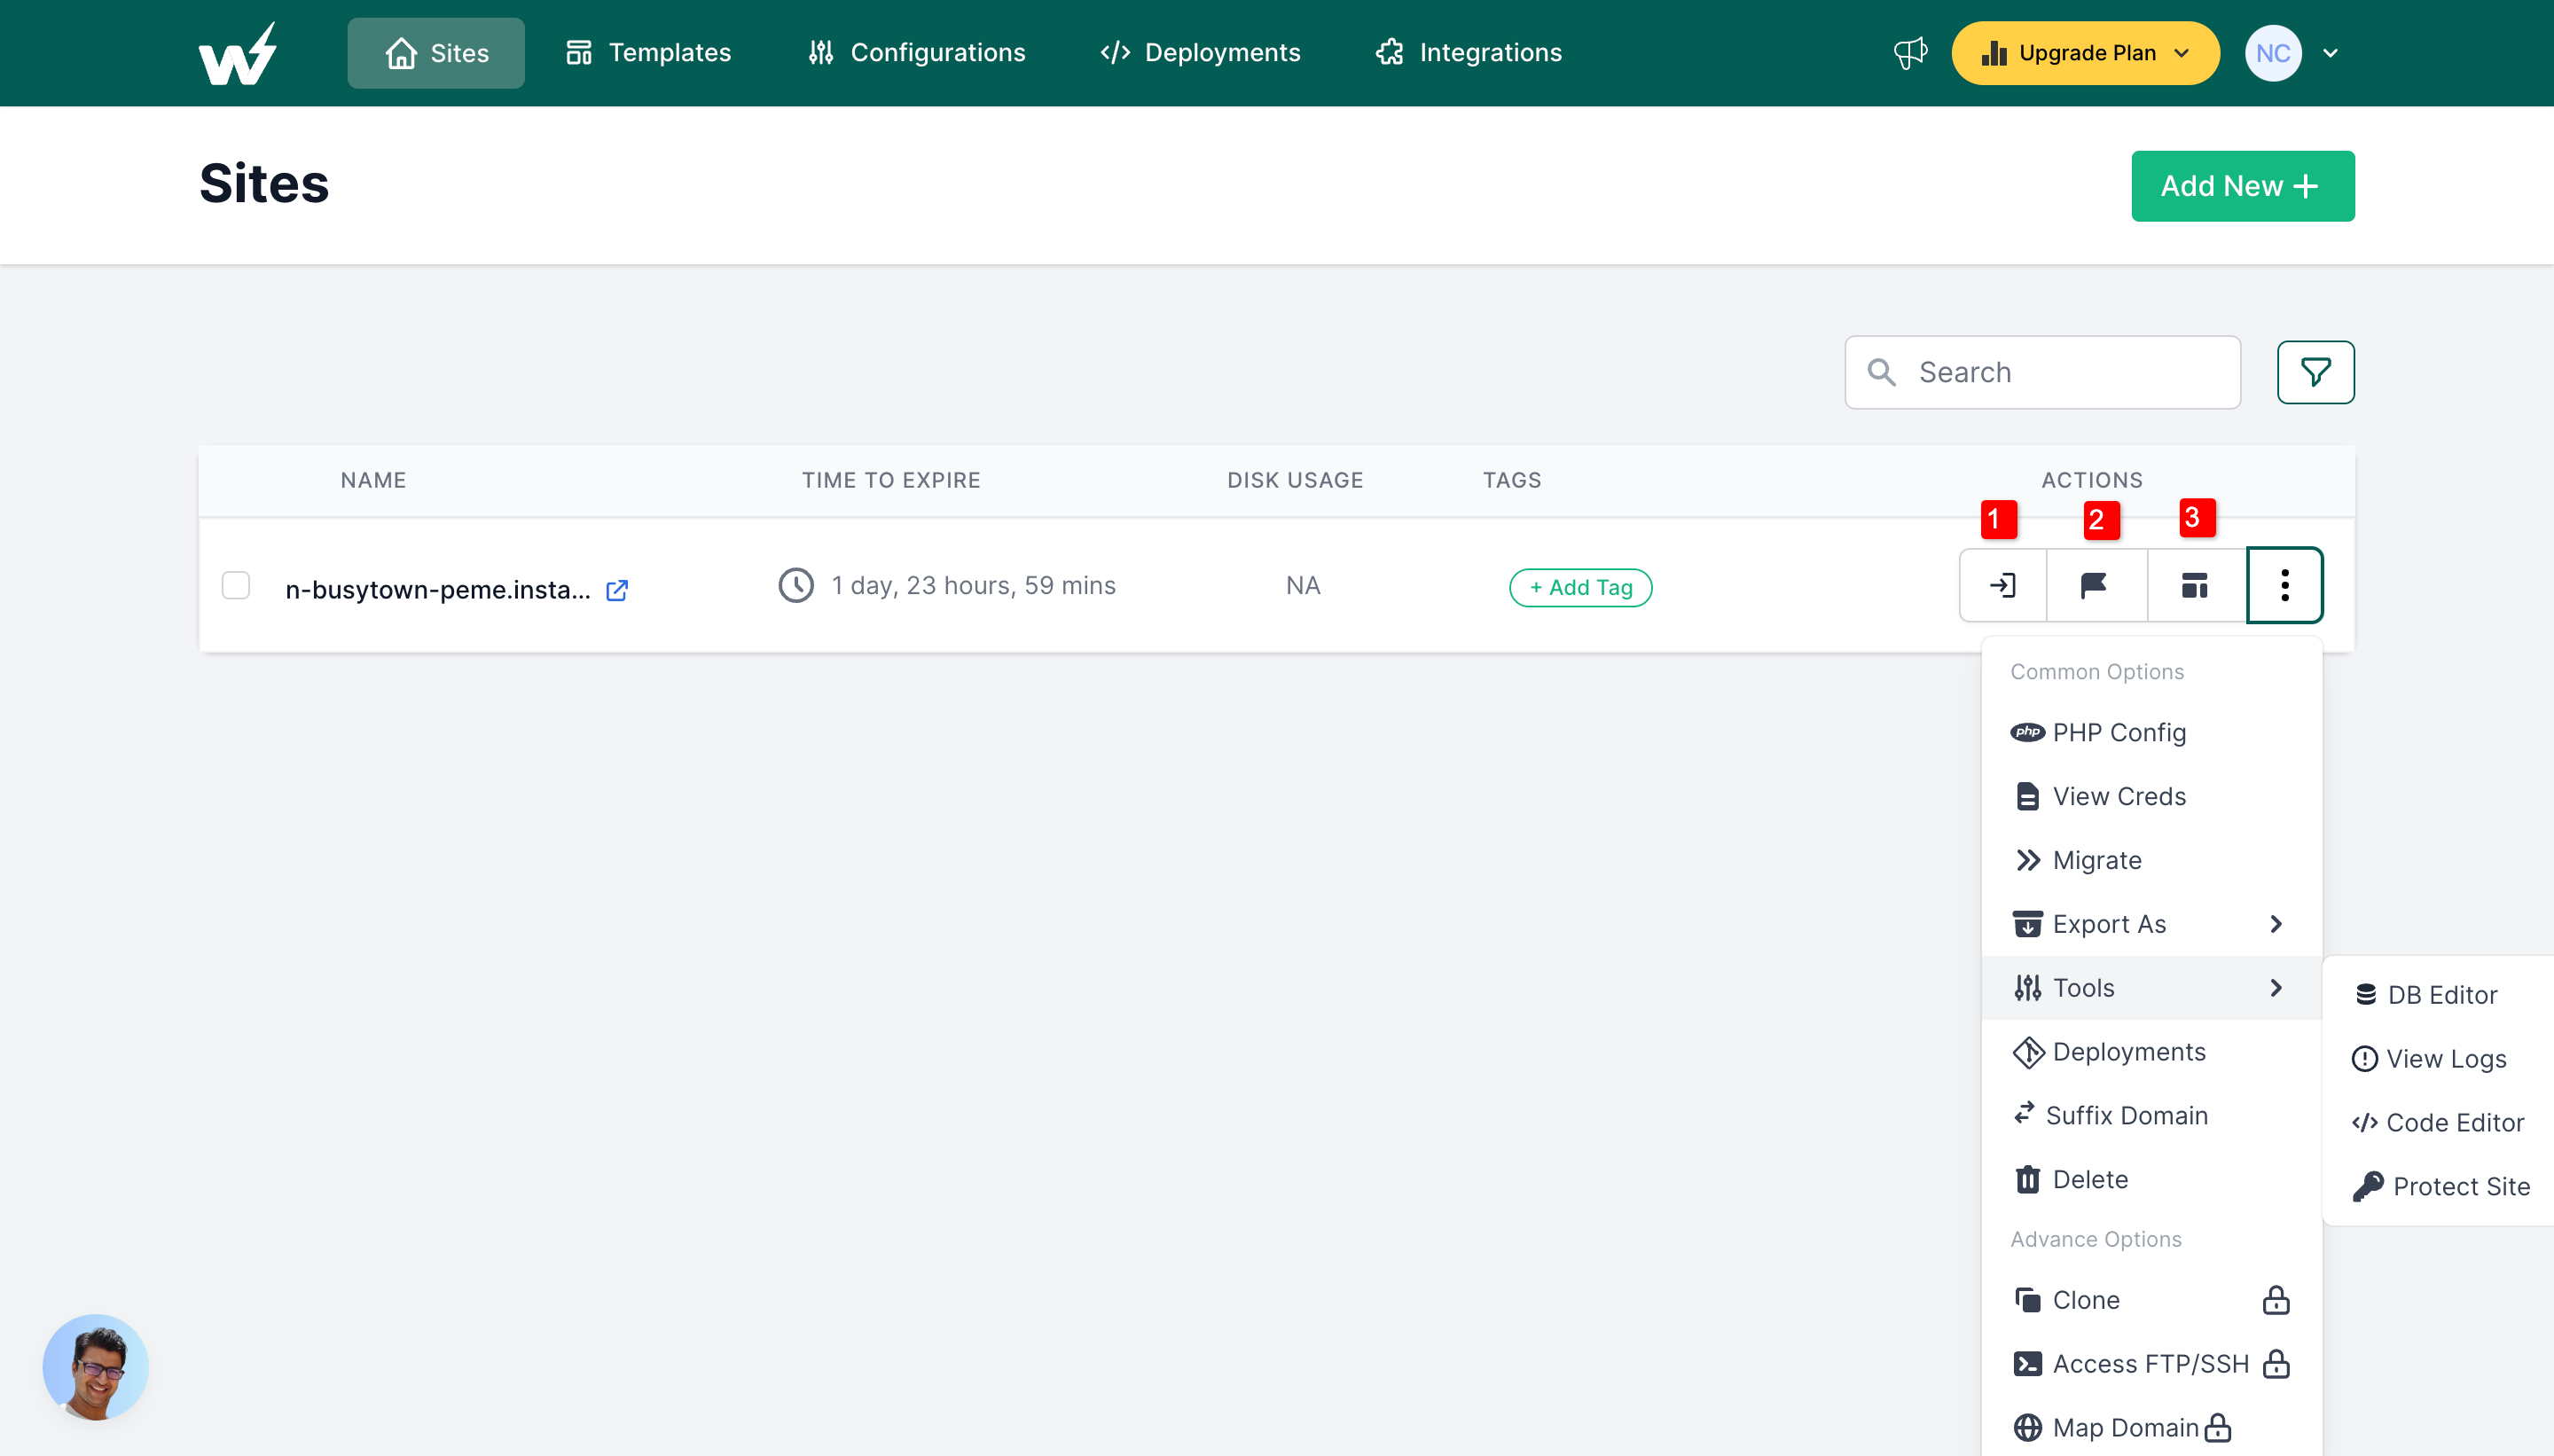
- The first option that you’ll find is the Auto-Login option that we’ve already discussed.
- Besides, the “Reserve” option is available in upgraded plans. But this feature means that you can reserve your site & it will never get expired or be deleted.
- Next is the “Save Template” option that you can access from the top panel beside Sites. A pop-box will appear if you click on the ‘save as template’ option. Configure the options like – Template Name, Description, & type.
It also has an “Instant Template” option that is available in pro versions, it consists of more advanced options, template branding, instant template, advanced deployments, and more. Under ‘More Options’ you’ll see the first PHP Configuration that you can access under the Configurations section.
- You can instantly transfer your staging site in InstaWP to your choice of external host site with just a single click through Migrate option. InstaWP also allows you to export as localWP
- If you want to work on a code editor or database then you can go through the Tools option. Aside from that, you can view logs and opt for protecting your site with a set username & password.
- Then there’s the suffix domain, which lets you choose the domain between the two options available.
There are some Advance Options that are available when upgraded to the pro version like Clone, Access FTP/SSH, & Map Domain.
Configurations & Deployments
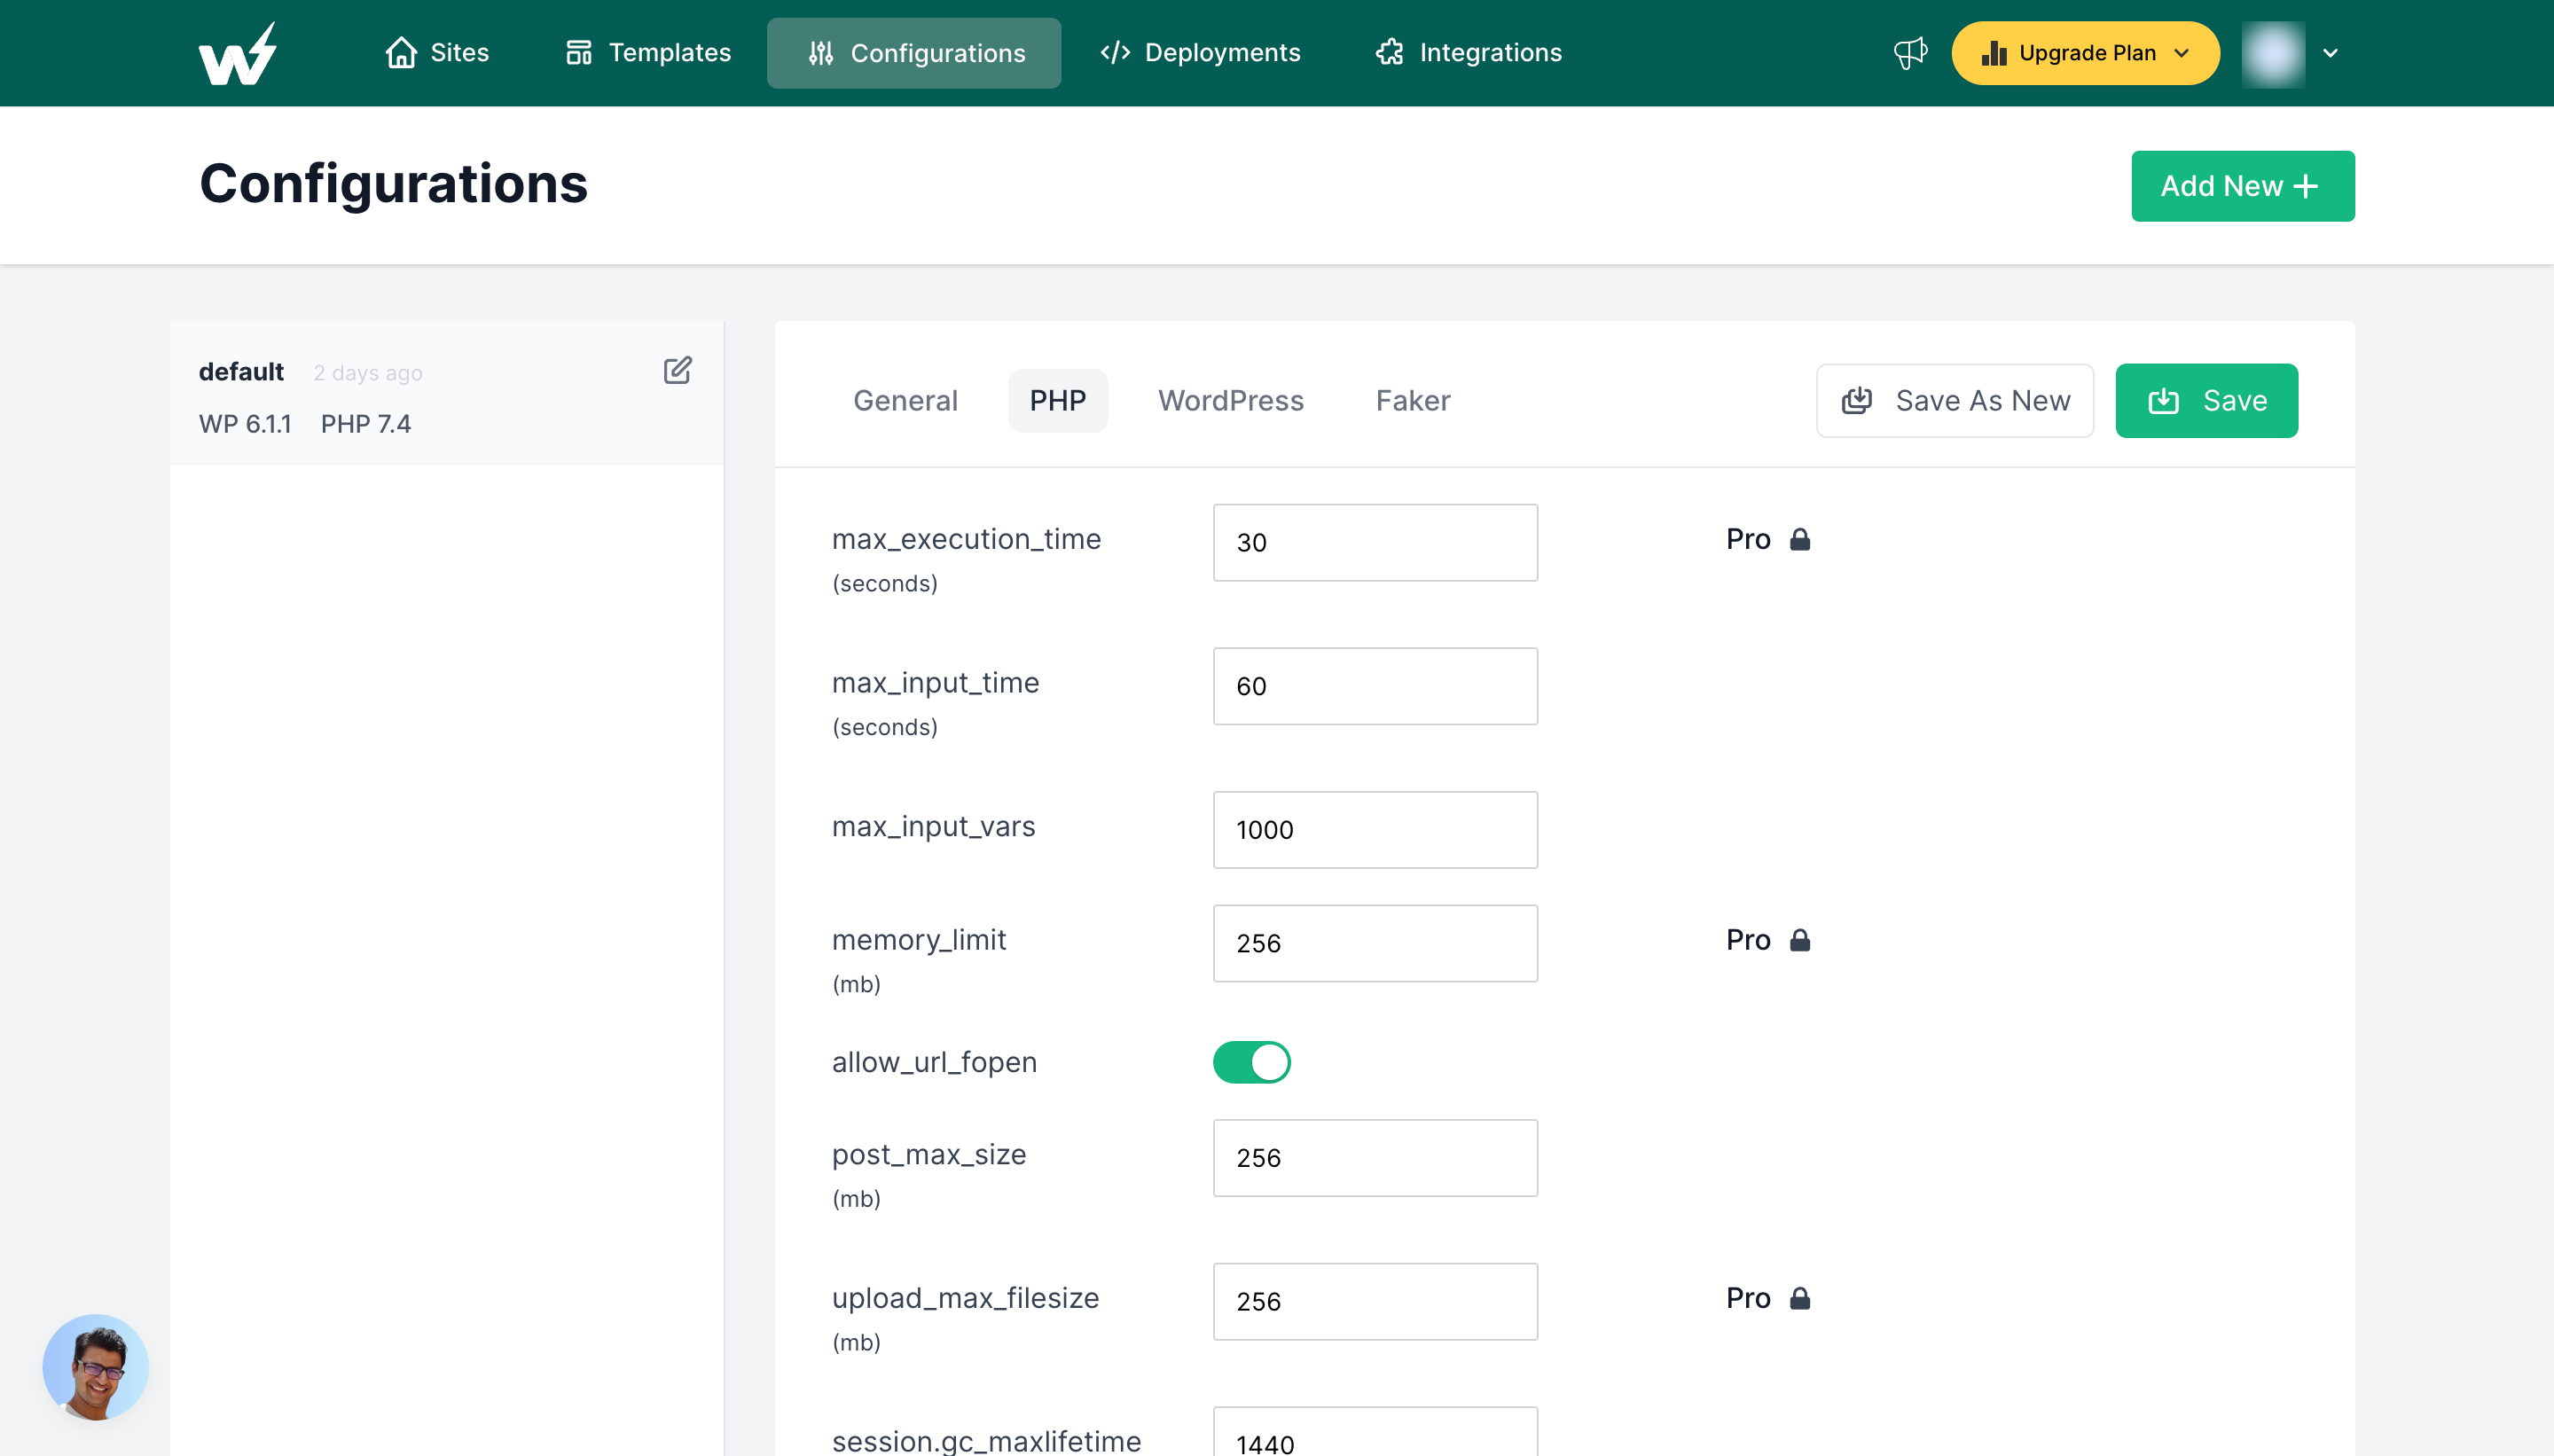
So, there are two more important features of InstaWP which are Configurations & Deployments. In the ‘more options’ on the site, you can ‘PHP Config’ option that opens up a dialogue box to update PHP configurations.
Aside from this option, you can directly go to the ‘Configurations’ section from the top panel. You can change WordPress & PHP versions, also configure more PHP settings. Moreover, you can configure under the WordPress tab like site language, pre-install plugins, themes, etc. Then there is a Faker option to configure.
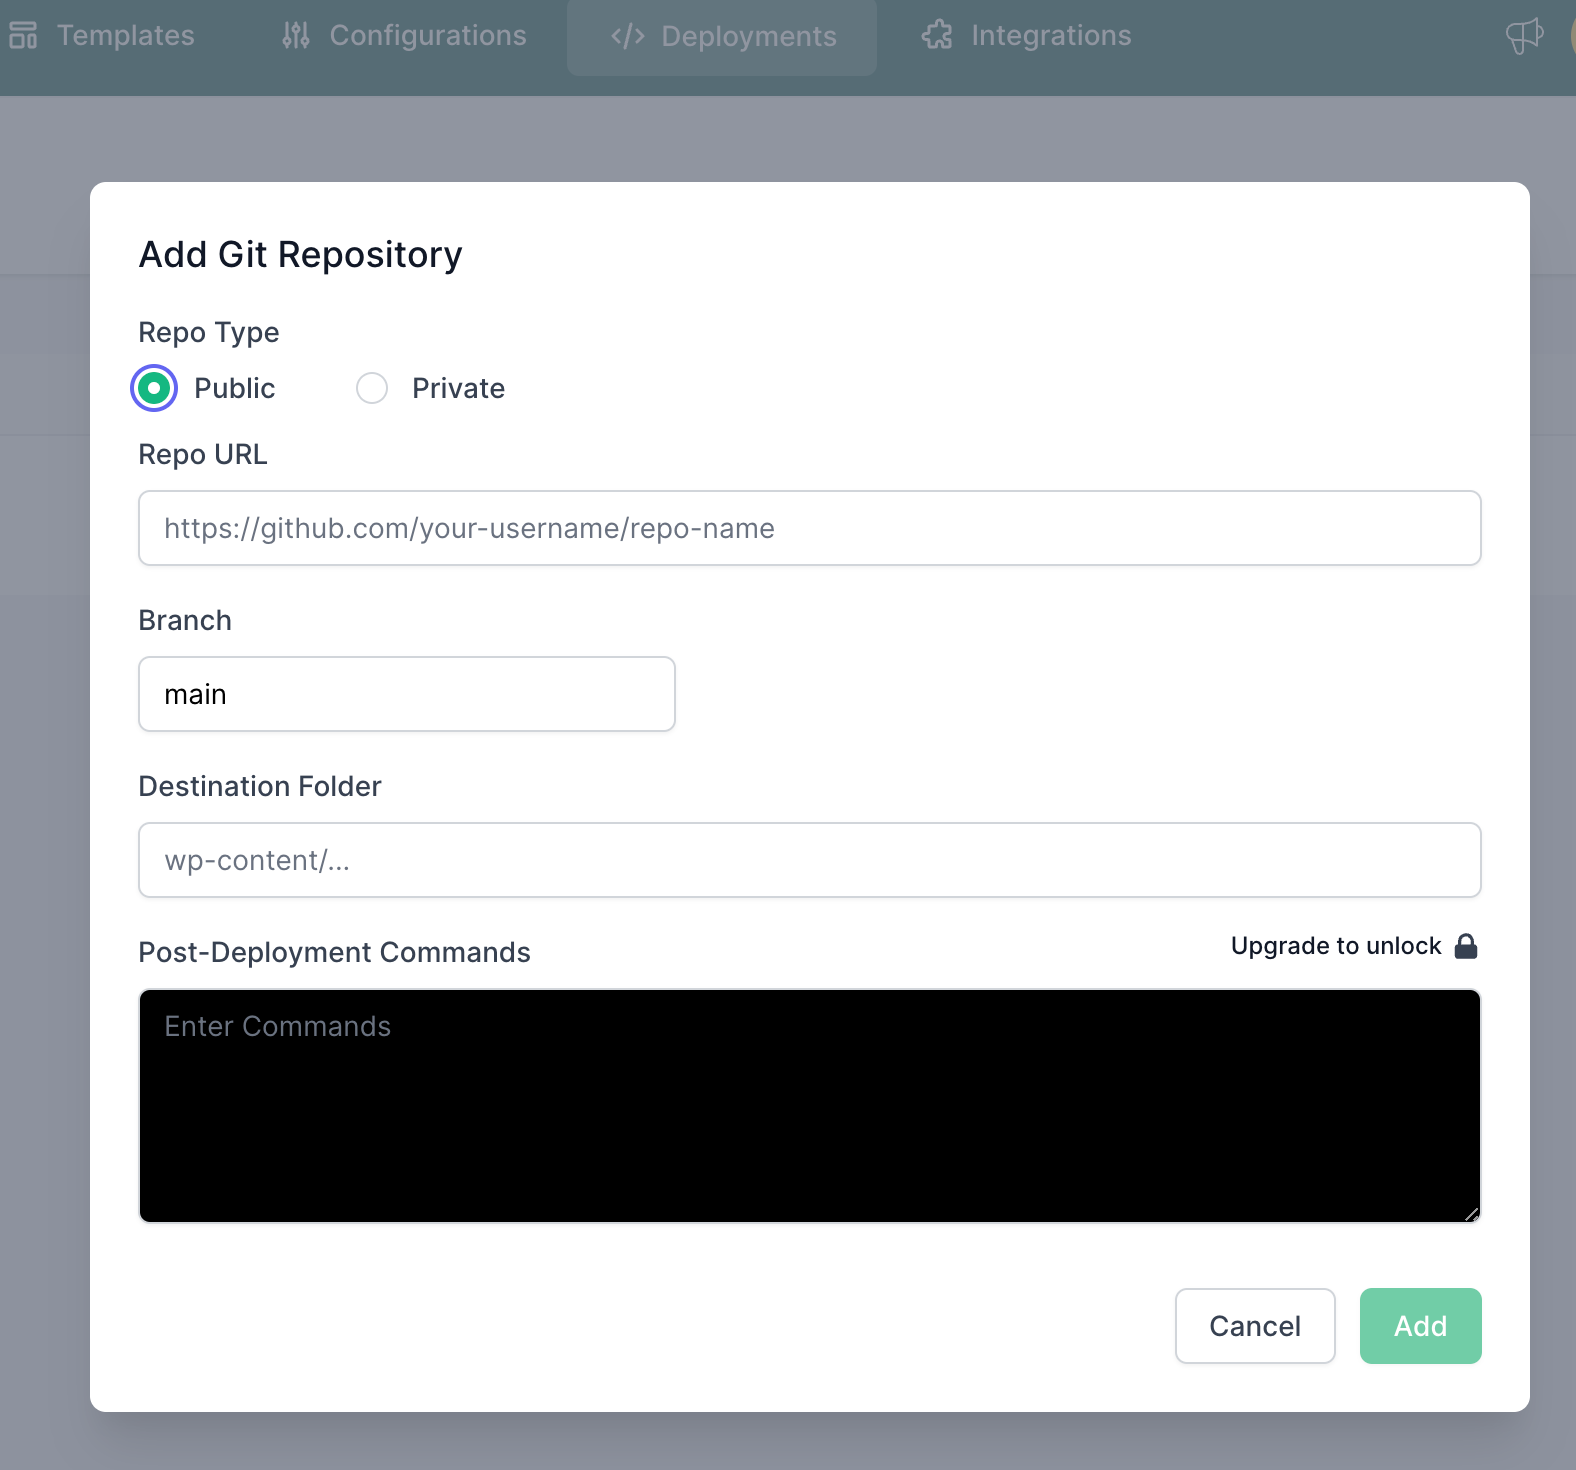
Then there is the Deployments option in the site settings or you can directly go to the ‘Deployments’ section. Click on the “Add New” button, it will show a ‘Add Git Repository’ dialogue box. Select the ‘Public’ repo type or ‘Private’ based on whichever repo you have.
In ‘Repo URL’, copy the ‘HTTPS’ link from your GitHub repository, then under ‘Branch‘ add the branch you want to deploy your site to, and further add the destination folder of your plugin.
Each time you create a new instance of a template your GitHub repository will be pulled and this folder content will be replaced with the contents of live Github code. Click on ‘Add’ and it will be added to your deployments tab.
If you have Private repo, then add SSH Link rather than a repo URL. Apart from that, generate SSH Key Pair that you can copy to your repository.
Integrations
There is another section of Integrations, it lets you integrate InstaWP with other apps or software. Currently, it just allows you to integrate with the Mailchimp newsletter. Under the Integrations section, click on the “add new” button and select the application you want to install.
So, this was all about the process to make a WordPress test site and how or what purposes all the features are. You configure settings as per your necessity, the last step process was more about explaining to you all the features of InstaWP.
Wrap-Up
The keynote is that test sites are an essential part of website development. If you want to debug a WordPress live site from all the major or minor errors, then prepare to do unlimited WordPress testing. Better safe than sorry!
And to not let you stuck anywhere, InstaWP is the best tool for creating a portable WordPress sandbox site. It’s free to use, and you can always upgrade to a subscription depending on your requirements.
Be amongst all those happy developers and clients who have used InstaWP for testing their site’s elements and playing it safe.

